
We make a cellar in the country with our own hands step by step: the optimal sequence of work
On the territory of a suburban area, it will not hurt to build a cool room for storing pickles, fruits, vegetables and other food products. In this regard, it is worth considering how to make a cellar in the country with your own hands. By completing all the steps step by step, you can create a reliable and durable storage.
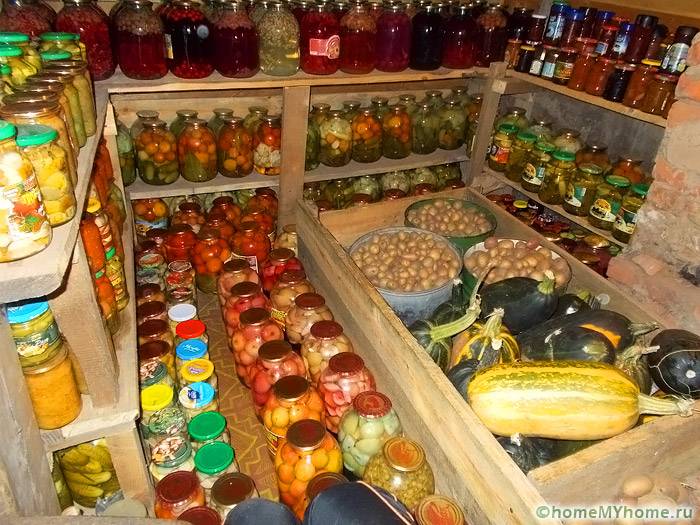
Even a small design allows you to store a lot of food
The content of the article [Hide]
- 1 Choosing the type of structure and location for it
- 2 Do-it-yourself cellar in the country step by step: basic work
- 3 The problem with a high level of groundwater: a cellar with your own hands
- 4 Do-it-yourself work after the construction of the cellar: photo + additional recommendations
- 5 Summarizing
- 6 Video: how to build a cellar with your own hands
Choosing the type of structure and location for it
The cellar is usually located in a separate place on the street or under a residential building. Its main purpose is to store food. Due to the device shelving, shelves and others devices it is possible to increase the functionality of the room.

An interesting design solution in the design of the upper part
Classification of cellars by the level of burial:

An example of an underground storage facility located in a dry location
The construction of the cellar does not require obtaining permits from any supervisory authorities, however, the developer must in any case decide on its location, taking into account some of the nuances. The area should be chosen as dry as possible, away from trees.

The structure is conveniently located under an alpine hill
Do-it-yourself cellar in the country step by step: basic work
After choosing a suitable place for a summer cottage, you can start basic work. These steps are relevant for underground and semi-buried structures.As for overground structures, they have a slightly different construction technology.
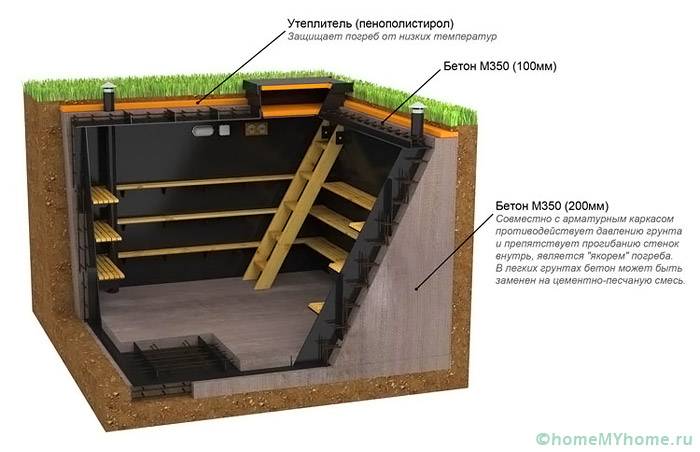
Visual plan of a small cellar
Preparation of the pit
When digging a pit, the points below must be taken into account without fail:
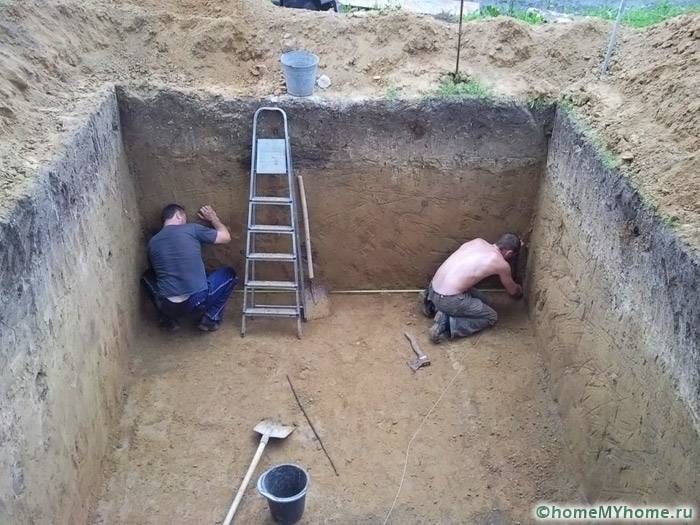
The pit is being prepared for further work
Base device in the form of a floor
The most suitable option is to fill the lower plane with concrete. For this, all garbage is removed from the pit. The surface is leveled and compacted, after which it is covered with a layer of sand of 15-20 cm. A waterproofing membrane and a reinforcing mesh are laid on top, then concrete is poured.
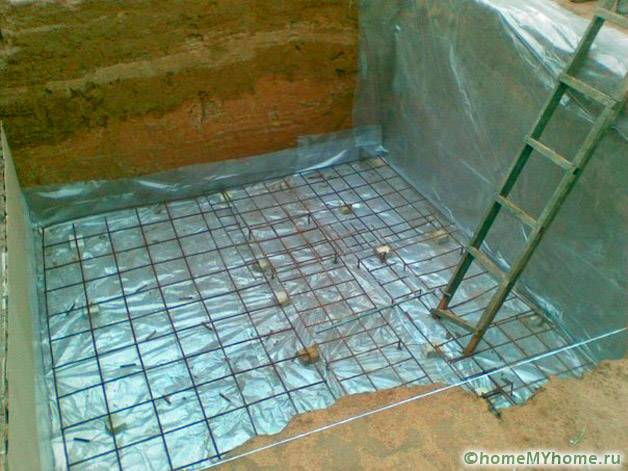
The base is ready for pouring concrete
Thus, when wondering which floor in the cellar is better to arrange, first of all, you should pay attention to the concrete base.
Erection of the walls of the structure
The sides of the structure must withstand ground pressure. Basically, when building them, the following are used:
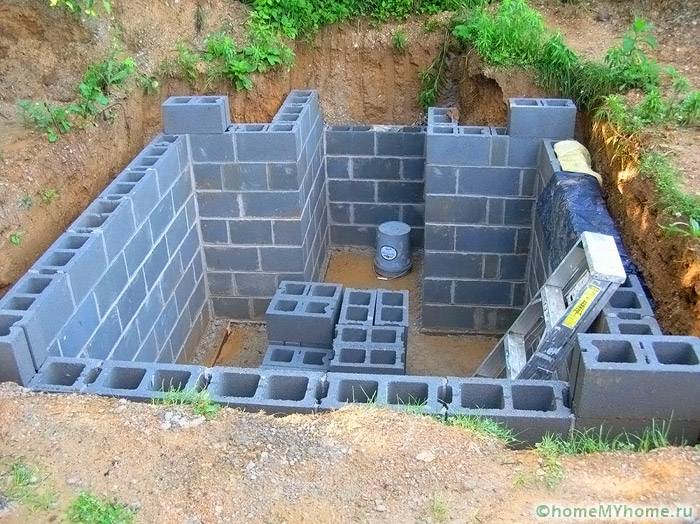
The walls are arranged using ready-made blocks
Floor laying
The first option for floors is wooden beams. Bearing elements are laid with edges on opposite walls, after which they are sheathed with boards. A waterproofing membrane is spread on top. The second option is to use ready-made reinforced concrete slabs. They are durable, therefore they are popular. They are laid on the end parts of the walls, after which they are covered with earth.
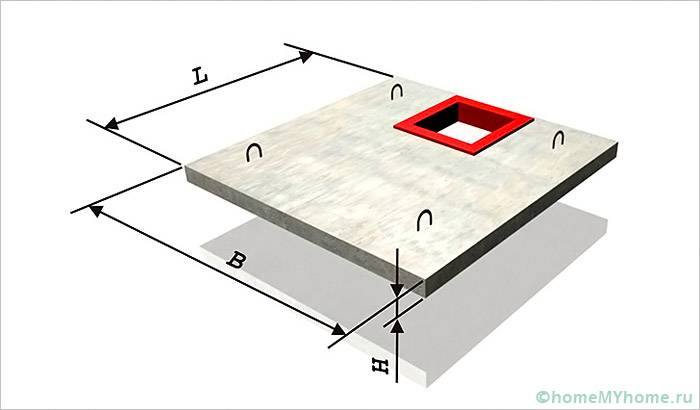
This is how reinforced concrete floors with an entrance opening look like
Creation of high quality ventilation
Constant air exchange will make it possible to avoid the appearance of mold and rot in the room, and will also allow you to maintain an optimal temperature regime. For device ventilation two pipes must be installed. One of them will be inlet and the other will be outlet.
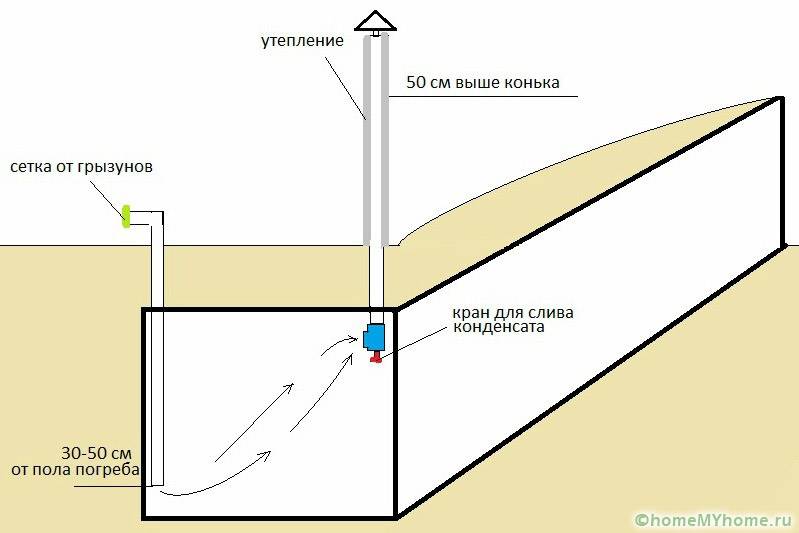
The diagram shows the location of the elements relative to the floor and ceiling
For ventilation, medium-diameter plastic pipes are suitable. However, their size depends on the volume of the room. Supply elements are usually located on one side, 20 cm from the floor, and exhaust - on the other, 30-40 cm from the ceiling.
Ventilation ducts on the street side
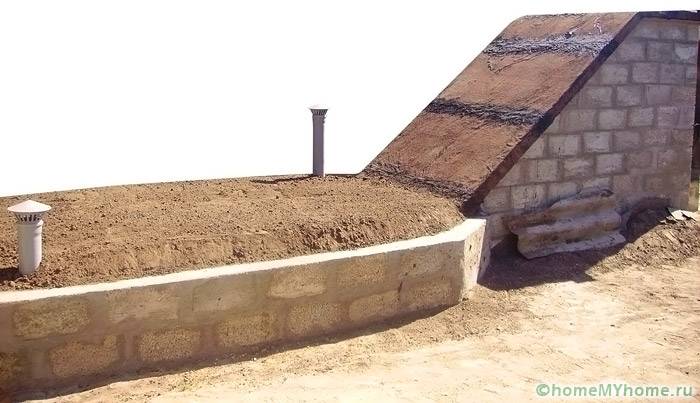
The problem with a high level of groundwater: a cellar with your own hands
A certain category of developers may have the following dilemma: if the groundwater is close - how to make a cellar? It should be noted right away that this is quite possible. For this, first of all, it is necessary to make a circular drainage of the site on which construction is planned.
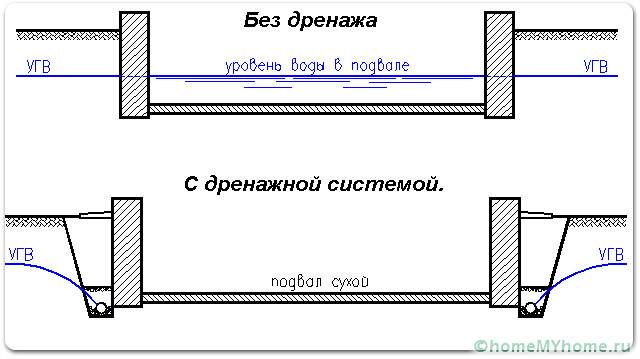
Drainage device advantages
Perforated elements are located below the depth of the soil along the perimeter of the excavation. Their slope should be about 2 cm per linear meter towards a well or sewage pit. The pipes should be backfilled with rubble and wrapped with geotextiles.

Drainage pipes are laid according to the following scheme
If the floor and walls are made of reinforced concrete, then high-quality waterproofing should be made from the inside and outside.
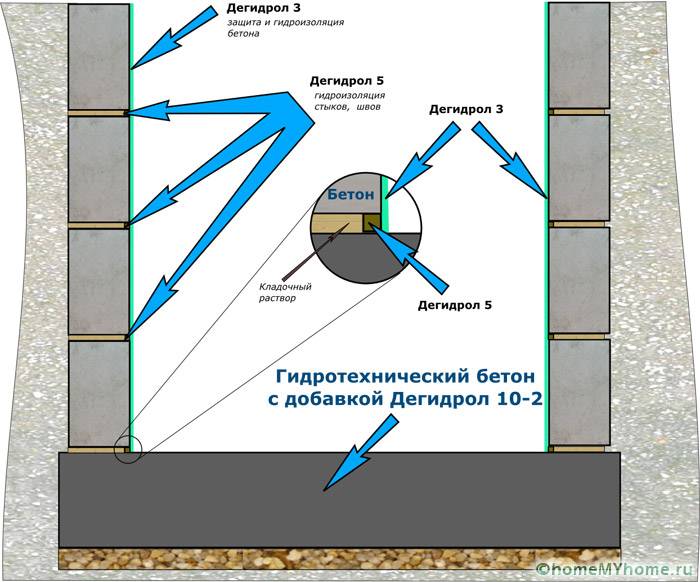
Cellar waterproofing with Dehydrol
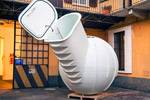
A large plastic container can be used as a sealed room. It is completely buried in the ground. By arranging a plastic cellar in the country with your own hands step by step, you can avoid mistakes associated with waterproofing the structure.

Convenient ready-made plastic cellars are on sale
Related article:
Do-it-yourself work after the construction of the cellar: photo + additional recommendations
Ensuring unimpeded ascent and descent is carried out using comfortable stairs... Its width should not be less than 40 cm, otherwise movement can be very difficult. It is allowed to make a slope up to 75 degrees. The material can be wood, metal or concrete.
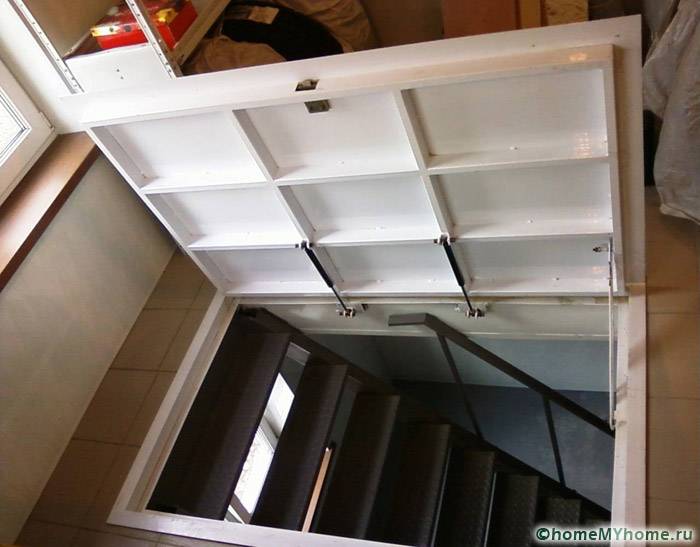
Convenient metal ladder for comfortable movement
To store supplies, you need to build special shelves or racks. Usually a 100x100 bar is used for their manufacture. The height of the structure depends on the height of the room itself.
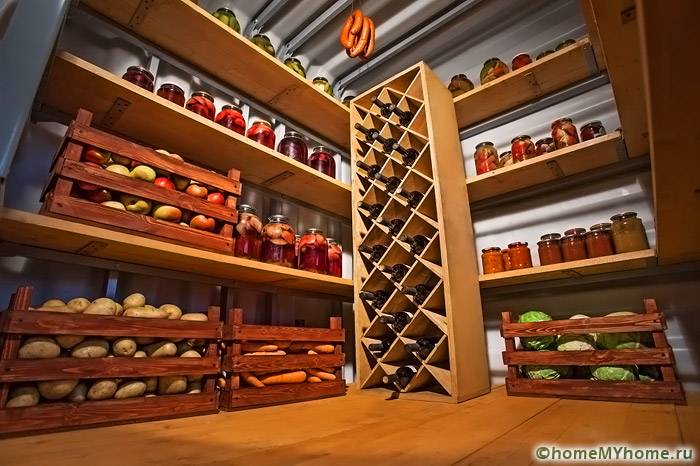
Organization of food storage system
Making a cellar in the country with your own hands step by step, at least at the last stage, you should remember about lighting the interior space. With the correct selection of lighting fixtures, high operational safety can be achieved. The wiring and its basic components must be protected from moisture, because even reliable waterproofing of the room can be broken at a critical moment.
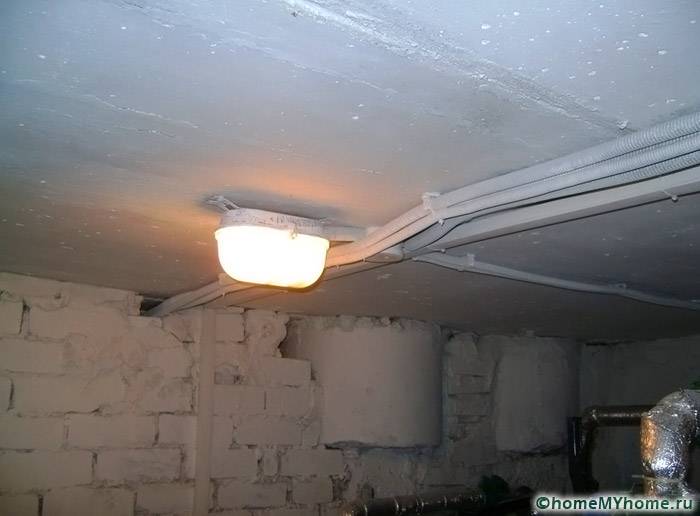
An example of safe lighting in a cellar
List of basic rules for lighting:

You can buy such a transformer in the store to lower the voltage.
Summarizing
If you can figure out how to make a cellar in your country house with your own hands, then you won't have to spend additional funds to attract professional workers. The erection of such structures to order is quite expensive, while controlling the quality of the work performed is quite problematic.
Video: how to build a cellar with your own hands


See also:
 Do-it-yourself greenhouse made of plastic pipes according to an individual project
  Do-it-yourself gazebo made of wood step by step: instructions with photos
  How to build a do-it-yourself chicken coop for 10 chickens
 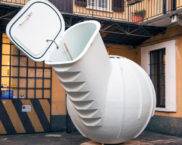 Cellar made of plastic - an alternative to traditional counterparts
  A few practical tips on how to choose two-room country houses with a toilet and shower
  How to build an aviary for dogs: photos of designs and recommendations of dog breeders


