
Bath interior decoration: photos, stages of installation work and choice of materials
After the construction of the bath, the turn of finishing work begins. Internal cladding serves an aesthetic function and is also used to protect wall, ceiling and floor surfaces. The use of furniture in this room will allow you to give the interior your own style and certain completeness. The interior decoration of the bath, a photo of which can be viewed on the website, can be done by hand. To do this, you will need to prepare certain materials and familiarize yourself with the technology for carrying out installation work.
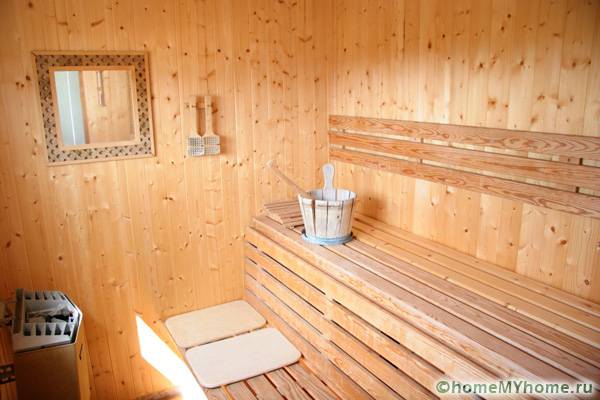
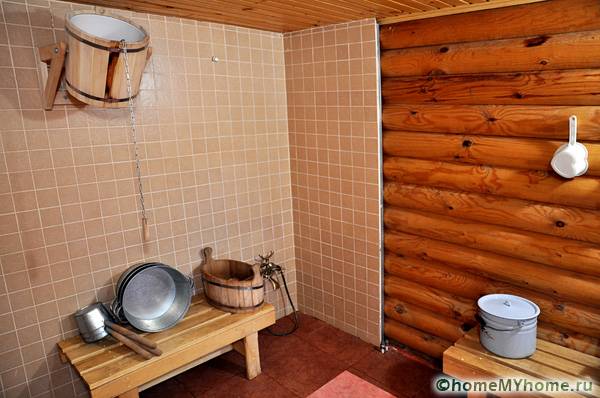
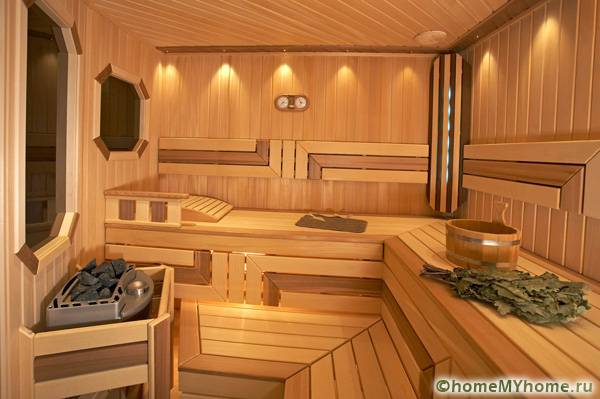
High-quality cladding inside the bath room can create a mood
The content of the article [Hide]
The choice of finishing materials for the interior of the bath
It is important to select quality materials before finishing the bath inside. Photo of interiors allows you to choose the appropriate option.
High-quality material can improve the performance of the room
The materials should have the following advantages:
One of the popular finishing materials lining is considered. It is characterized by safety and attractive appearance. This material is made from larch or cedar.
Lining is considered the optimal raw material for arranging a room with high humidity
Bath interior decoration: photos and stages of work
With the help of the lining, the external cladding and decoration of the bathhouse are made inside. Photos of the best options can be viewed on the website. Clapboard wall cladding looks very attractive. In this case, the boards allow you to level the surface.
Clapboard cladding can be done independently
The installation technology is characterized by simplicity. The lining is placed in the steam room to adapt to the internal microclimate. The uneven surfaces are then leveled with battens.
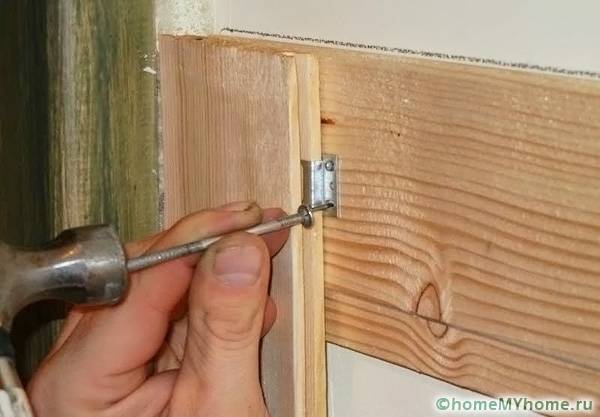
When performing plating, it is worth stocking up with a suitable tool in advance
Slots and joints should be well caulked. The lathing is made of special strips. They are mounted at a distance of half a meter from the surface. If the walls are even, then the crate does not need to be mounted.
Features of flooring
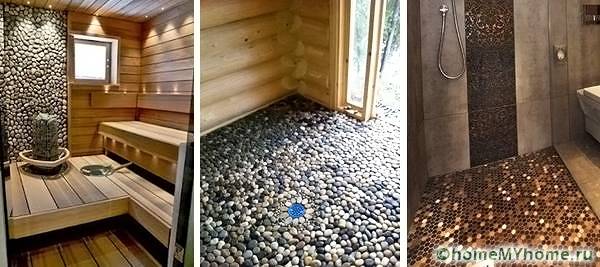
Most often, finishing work begins with the flooring. Finishing the floor of the bath inside, the photo of which can be viewed on the site, must be protected from unnecessary drafts. Can be used as a coating tile or edged board.
Finishing the flooring can have interesting design solutions
Rough flooring is done with clay or concrete. At the same time, it is important to think over the system for removing water from the room.
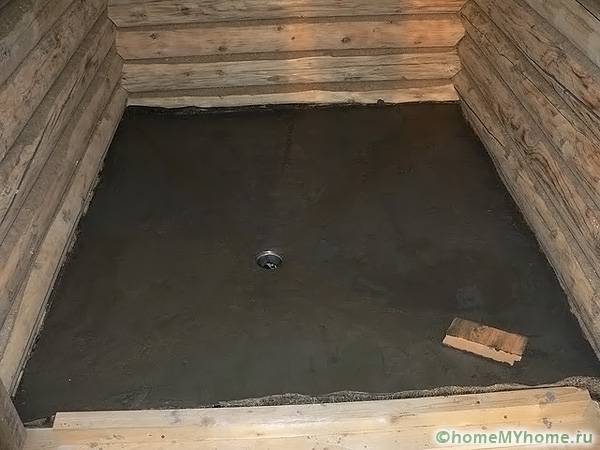
Rough coating requires additional time for the material to cure
The flooring can be made from cork, boardwalk or fiber mat.

Cork can diversify the chosen interior
The wood laying process is simple. Logs are mounted, and then boards are laid. For covering, a tongue-and-groove board option is used. In this case, the thickness of the wood should be about 30 cm. The wood is preliminarily treated with antiseptic agents and agents against the growth of fungus.
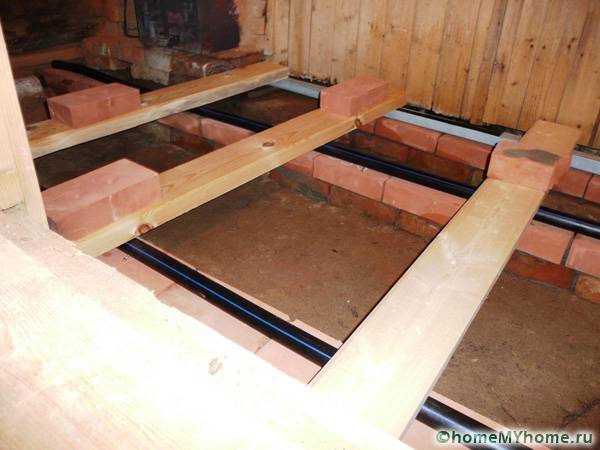
Wooden boards are mounted on brick bases
Tiles are considered another popular finish. For this, a floor screed is made. The tiles are mounted on special glue. A moisture resistant grout is used to process the seams. To prevent slipping on wet surfaces, wooden gratings should be installed.
In the steam room, the floors can be made of non-slip tiles, and in the relaxation room, you can use a regular floorboard
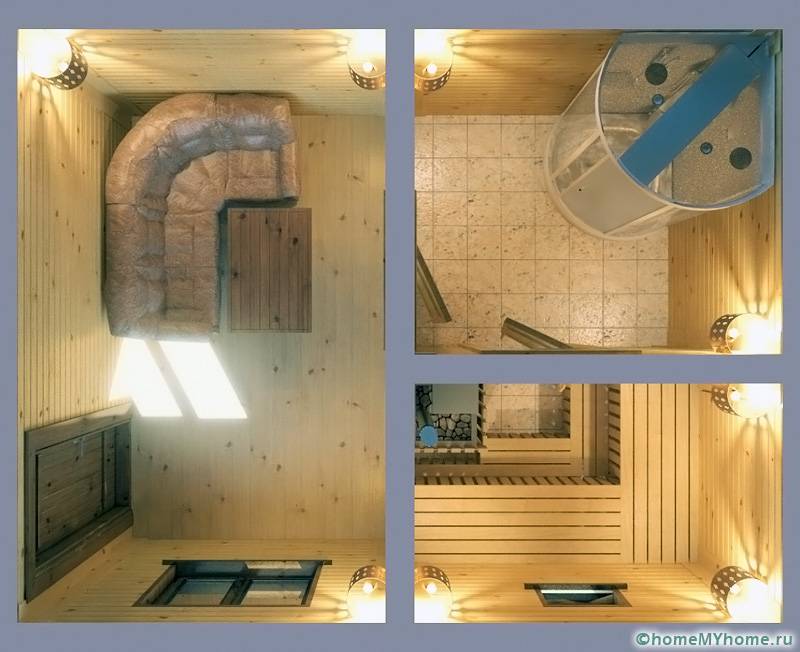
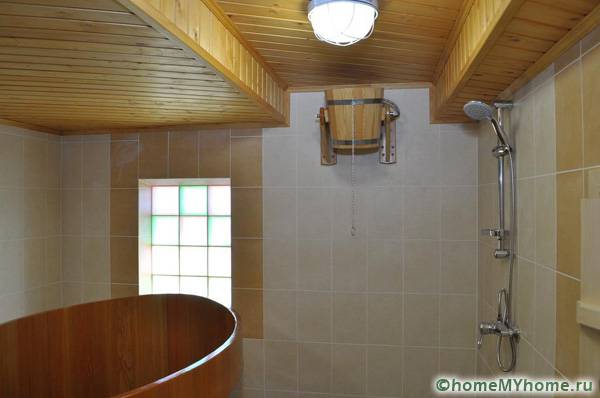
It is important to properly finish the floors in the sink. They should have two tiers. The bottom one is made of concrete, which will withstand water flows. This produces a special surface slope and drain. The tier on top should be made with a crate. To create it, conifers are taken. Gaps are left between the boards through which water must pass.

An interesting solution is the installation of a warm floor in a bath room.
Related article:

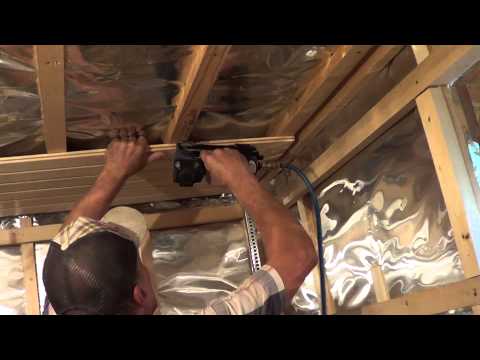
Bath interior decoration: lining fixing video
They will help control the process of finishing the bath inside the photo with the sequence of stages of installation work.

The choice of finishing materials depends on the size of the room and the planned design option
The interior cladding does not use standard nails, which corrode and rust stains.
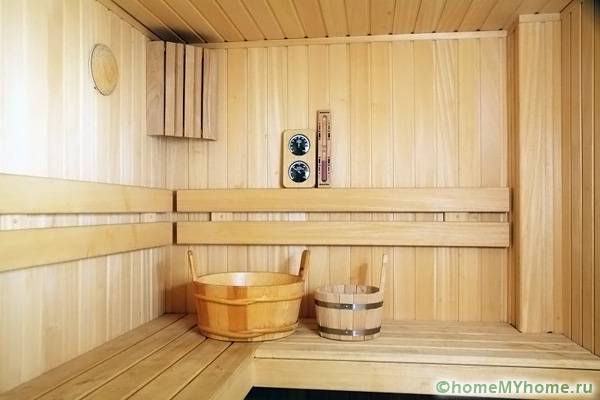
The tile is considered one of the best solutions in terms of ergonomics
The lining is cut taking into account the height of the bath, and then mounted to the prepared lattice. For finishing, specially treated wood is used, which is resistant to strong moisture and temperature fluctuations.
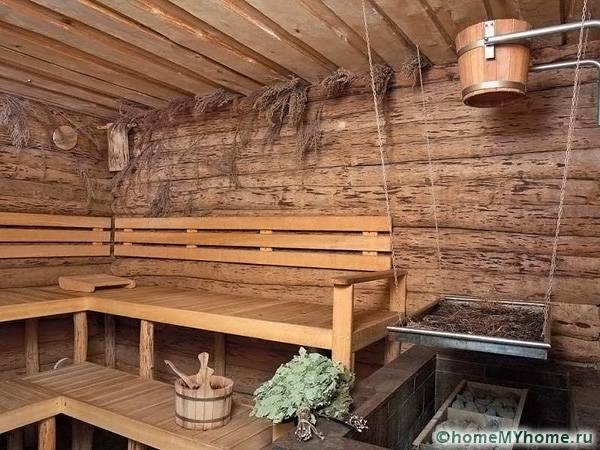
The rest room can be finished with various materials and at the same time choose an unusual design
When installing, it is worth using level... Antiseptics are processed frame system and lining. The material is installed from the corner. For fixing, staples and special nails are used. The lining can also be used to decorate the ceiling. In this case, the material should have a small amount of resins. Otherwise, the hot drops can burn the skin. The area around the stove is finished with materials that are not prone to burning. It could be tile or brick.
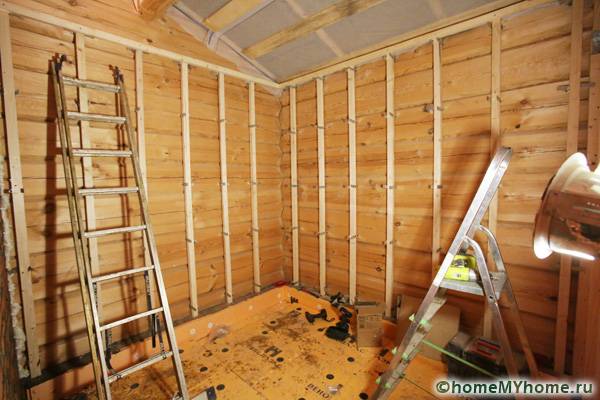
Before sheathing the walls, lathing is performed
The inside cladding must not be varnished or painted, as such coatings will not let steam through. A space of 20-30 mm should remain between the facing material and the frame. In some cases, ceramic can be used.This material does not absorb moisture and does not crack. Since this flooring is cold, wood flooring can be laid on top.
Combined materials are often used for wall decoration.
How to insulate and insulate walls?
Allows you to see the features of finishing the bath inside the photo. The steam room must first be insulated. In some cases, mineral wool is used, which is laid on the crate. If the bath is built of stone or concrete, then you can do without insulation... It is important to perform the correct waterproofing constructions. Aluminum foil is best suited for such purposes, or even vapor barrier film.
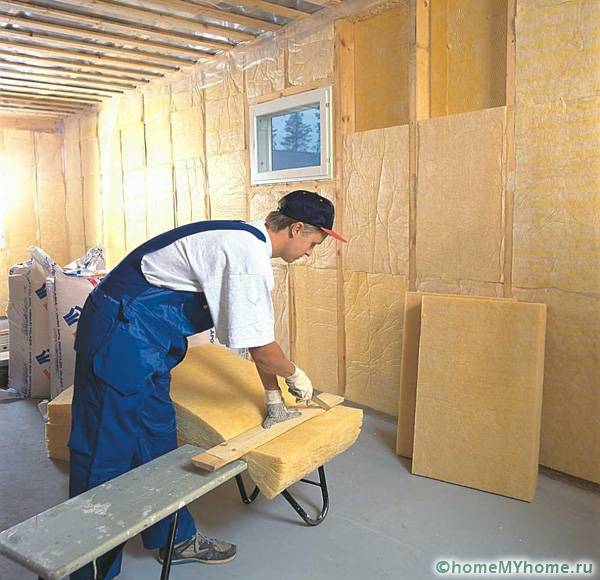
Thermal insulation is carried out with mineral wool
Wall insulation is carried out taking into account certain recommendations:
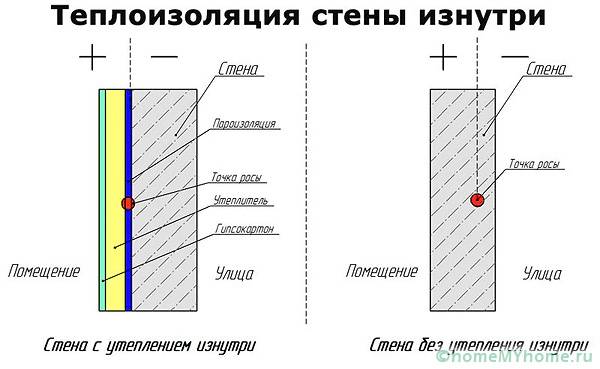
The use of insulation shifts the dew point to the surface of the wall and avoids destruction
If bath made of brick, then the thickness of the insulation can be about 10 cm. If the wall is made of timber more than 20 cm, then they can not be insulated. After finishing, you need equip the room with furniture and original decor items.
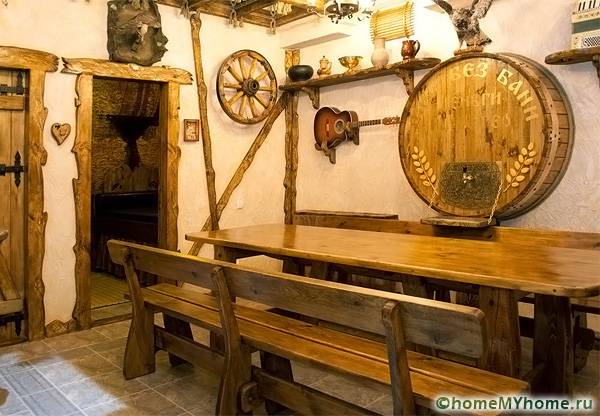
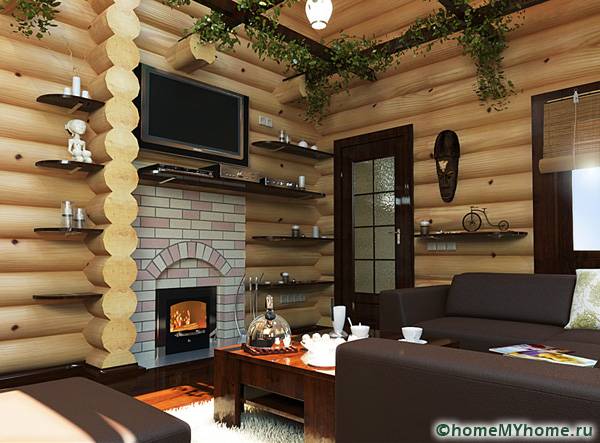
The interior decor of the bath depends on the preferences and tastes of the owners.
Useful tips: the nuances of finishing work for a bath
Particularly noteworthy is the decoration of the sauna rest room inside. Photos of interesting solutions can be found on the Internet.
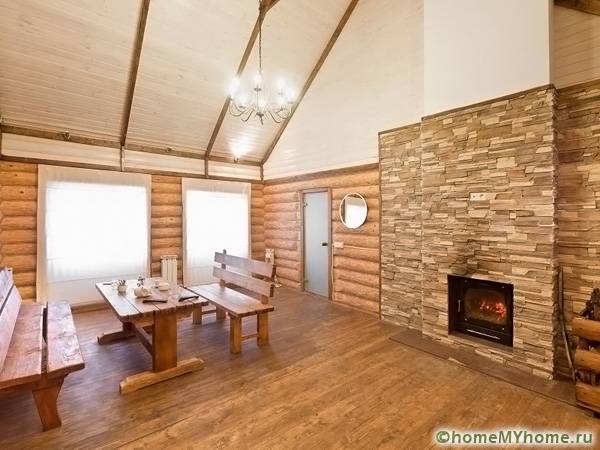
The combination of stone and wood in the interior is especially appreciated.
Knowledge of some of the intricacies of installation will help to carry out the finishing work qualitatively:
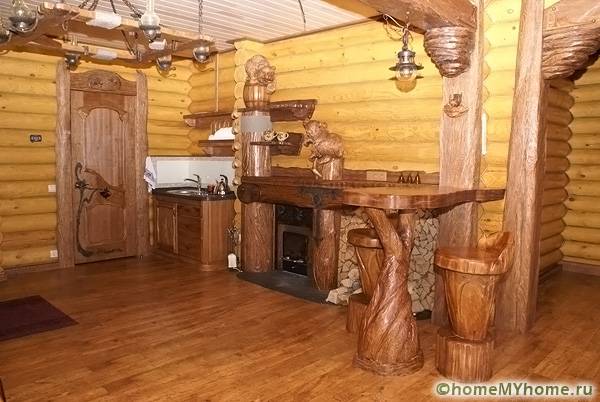
The use of carved products will add personality to the room
Natural wood is used for interior decoration. Walls can be sheathed with clapboard, especially from cedar. An original interior can be created using a block house. These are processed boards that imitate real timber.
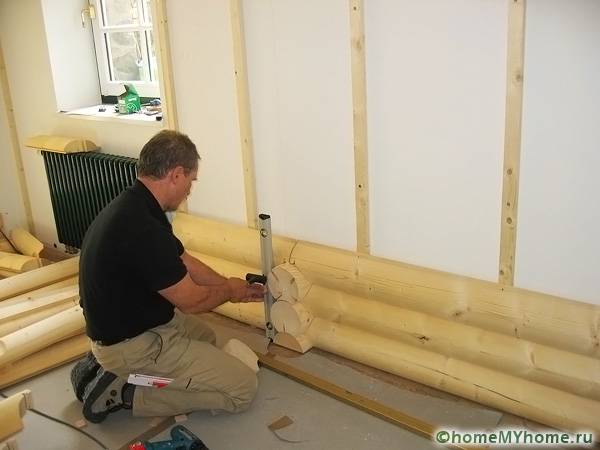
Block house wall decoration requires accurate calculations.
Windows and doors should be kept small to reduce heat loss. Doors must be strong and thick. For internal cladding, boards without knots are selected.
With proper skill, you can create a stylish interior with your own hands.
You can do a beautiful finish in the bath with your own hands. If you choose high-quality material and follow all installation technologies, you can create a functional and original cladding.
Video: ideas for decorating steam rooms and saunas


See also:
 DIY stencils for decor: templates and techniques for their production
  Children's rooms for girls: photos, design and recommendations
  Swivel retractable TV bracket on the wall: features of selection and installation
  Diagram of connecting a 220V LED strip to the network: how to do it correctly?
  Tips on how to bring beautiful houses to life, photos of which inside and outside are found on the Internet
  🍾 A beautiful present for the New Year with your own hands: how you can decorate a bottle of champagne


