
DIY step-by-step siding installation: instructions for dummies
When finishing facades it is necessary to choose a material that will provide a high degree of protection of the walls from the negative effects of the environment and will be able to maintain decorative properties throughout the entire period of operation. That is why many people choose siding for finishing not only new buildings, but also for the restoration of erected buildings and objects. The simple assembly technology of the "constructor" type will allow you to quickly and inexpensively complete the installation of siding with your own hands - the instruction for dummies describes in detail all stages of work.
The popularity of siding can hardly be overestimated due to its versatility, accessibility and aesthetics.
The content of the article [Hide]
Advantages of using panels for facade decoration
Finish withiding panels buildings, in comparison with other materials, has the following advantages:
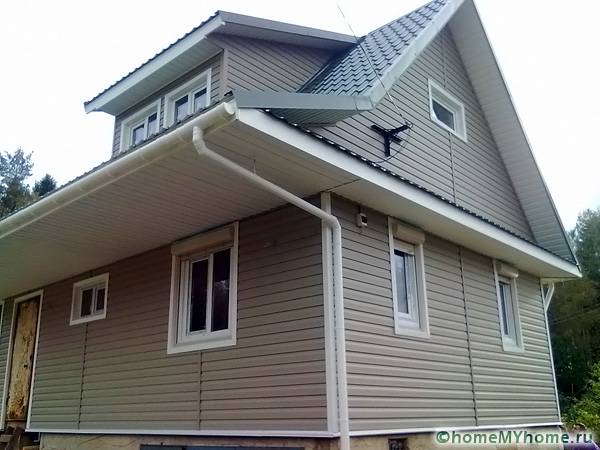
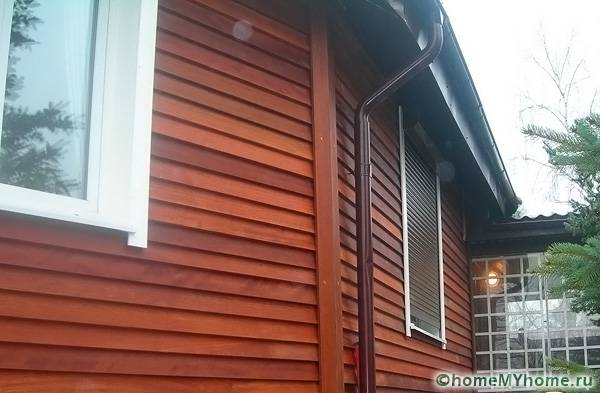
Exterior of a house clad with siding
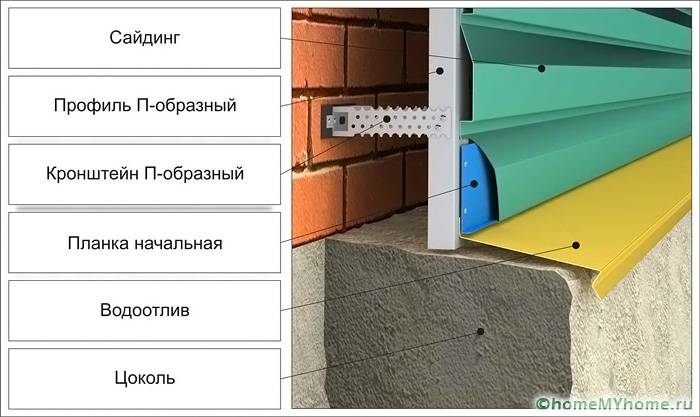
Types of additional components
In order to simplify the installation of facade cladding, a lot of additional components are produced, designed to ensure tight abutment to various elements of the house, assembly of surfaces of complex shapes, as well as reliable engagement with the main wall. material.
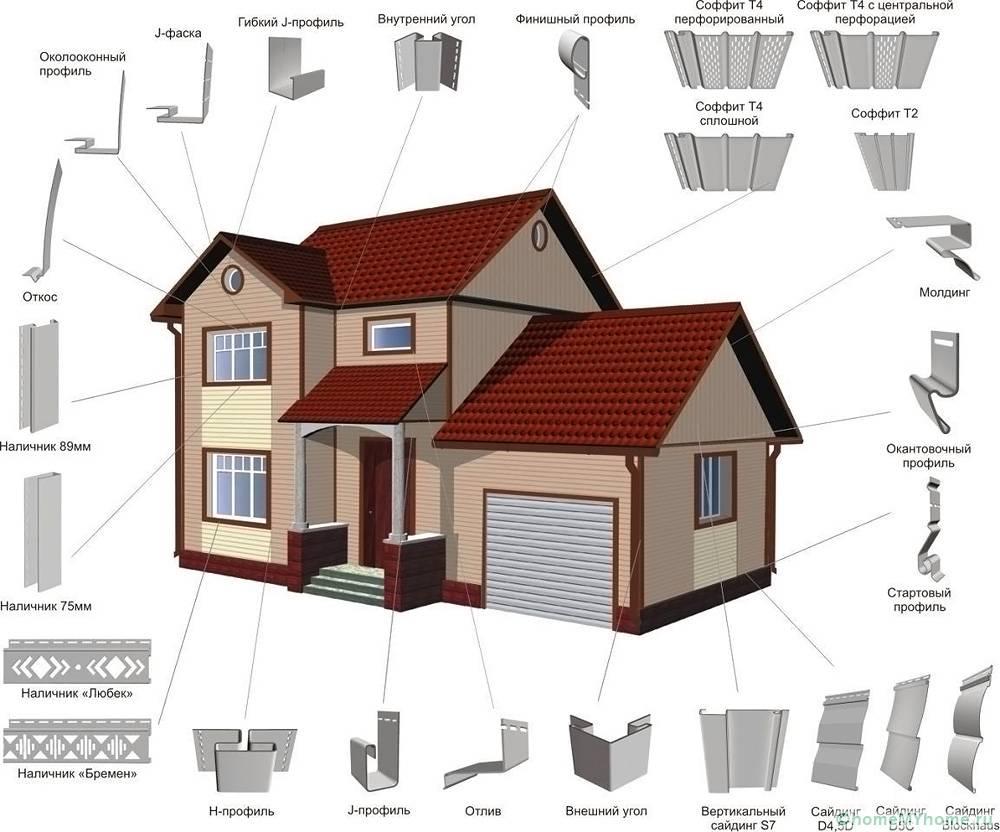
Types of additional structural elements
List of additional components:
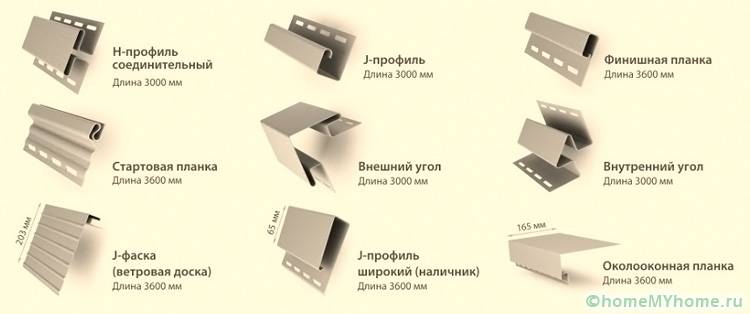
Without these elements, it will not be possible to sheathe the house with high quality and beautifully
Siding installation price per m2 for work
Siding of objects with the involvement of professional teams of builders will be performed efficiently and in the shortest possible time. At the same time, it is not necessary to order the execution of a full range of works, but only individual services are enough.
The cost of work will depend on the following factors:
In each case, the miscalculation will be performed by a specialist of the selected company.The table below shows the prices for siding installation, price per m2 to work.
The approximate cost of carrying out the main and auxiliary work during the installation of siding for Moscow| Facade works | Unit rev. | price, rub. |
|---|---|---|
| Installation of vinyl siding on walls | m2 | 250 |
| Installation of vinyl siding on roof hemming | m2 | 300 |
| Installation of fiber cement siding | m2 | 680 |
| Installation of hydro-vapor barrier film | m2 | 60 |
| Installation of wooden lathing on wood | m2 | 100 |
| Installation of wooden lathing on brick or concrete | m2 | 200 |
| Installation of insulation 50 mm | m2 | 90 |
| Insulation installation 100 mm | m2 | 170 |
| Fire-bio processing of a bar | running meters | 14 |
| Fire-bio treatment of wood surfaces | m2 | 80 |
| Fire-bio processing boards | running meters | 19 |
| Installation of metal sills | running meters | 100 |
| Installation of ventilation grilles | PC. | 140 |
Preparatory work
Before carrying out the installation work on the facade cladding, it is necessary to carry out a number of preparatory work. They include the following stages: the choice of the type of panels and lathing, the calculation of materials and additional elements, as well as the determination of the number of thermal and waterproofing layers.
Panel type selection
The choice of material for cladding largely determines the service life of the entire structure, strength and performance characteristics. The choice is currently limited to the following options:
The appearance of wood panels

Metal panels

Vinyl panels
Calculation of the amount of materials
The amount of material can be calculated quite simply if you have a building project on hand. Otherwise, you will have to measure the length and width of each of the walls, as well as window and door openings. Based on the data obtained, a sketch or drawing should be made. After that, the amount of material that will be used to create the lathing is determined, taking into account the uniform arrangement of vertical or horizontal guides with an interval of 40-50 cm and fastenings along the guides with the same interval.
After calculating the amount of materials for the lathing, you need to calculate the number of panels. This can be done quite simply by dividing the total area of the walls, minus the areas of the openings, into the dimensions of one panel. It is recommended to add a margin of about 10-15% to the obtained value, which will take into account possible damage during delivery or installation.
It is recommended to create a list of additional elements with an indication of their quantity, so as not to forget to purchase them at the same time as the cladding panels.
Calculator for calculating the amount and cost of siding per home
List of required tools
For installation work, you will need the following tools:
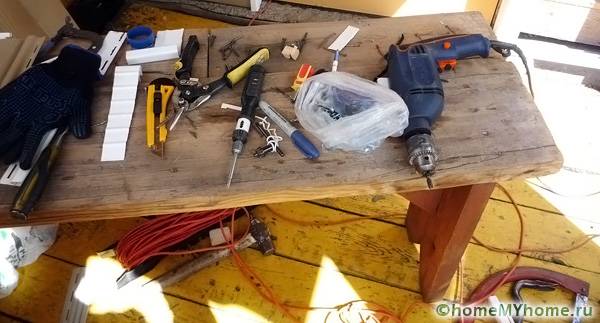
Tools for work
Preparing walls for installation
First you need to dismantle the roofing, window and door parts that protrude beyond the plane of the wall: skirting boards, ebb, drainage pipes with fixings from the roof, etc. This will allow you to get unhindered access to the walls. If any finishing layers have been installed or applied, then it is also recommended to clean them up to the main wall material.
A thorough inspection of the strength and reliability of the supporting structures will ensure that there are no problems during the operation of the siding, which are associated with the implementation of its complete or partial dismantling. If cracks, irregularities or other defects are found, they will need to be eliminated.
DIY siding installation - instructions for dummies
After the successful completion of the preparatory work, you need to plan the installation work. To do this, you need to place building materials near the object in order to have convenient access to them. The stages of installation work are as follows:
Installation structure of the main elements
Installation of crate
It is recommended to install the cladding panels horizontally, since with this arrangement it is quite easy to build up the cladding. Therefore, the lathing guides must be vertical. Of course, vertical cladding is also allowed, but in this case, the appearance of the building will have an unaesthetic appearance due to the visual effect of narrowing the walls.
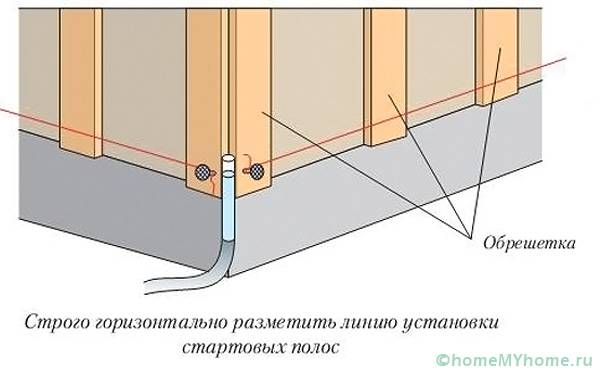
Level markings for crate
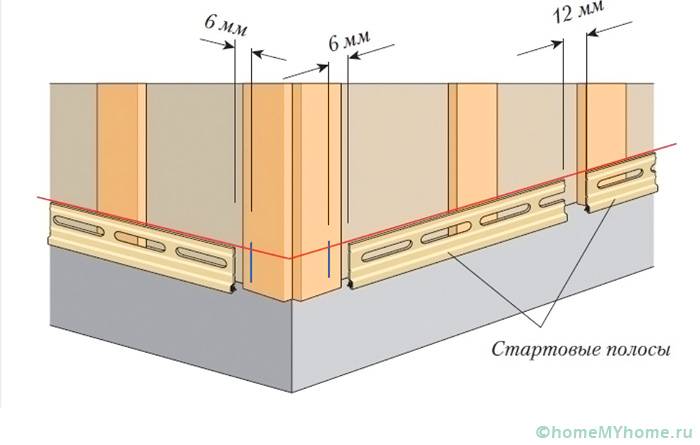
Installation of lathing for siding can be performed on nails, dowels or screws, depending on the material of the walls. First, the wall is marked with chalk or a marker, in accordance with the drawing made during the calculations. When attaching to dowels, we pre-drill holes in the wall.
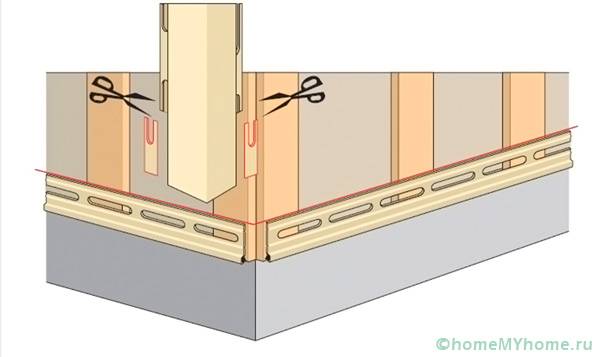
We install the slats from one of the corners of the building. First, we fix the upper part, then align the position vertically using a plumb line. Then we finally fix the guide. Then, along the lower level of the fixed rail, we pull the rope in a strictly horizontal position to simplify the alignment of all subsequent rails.
The subsequent slats are installed according to the marking with control of their position.
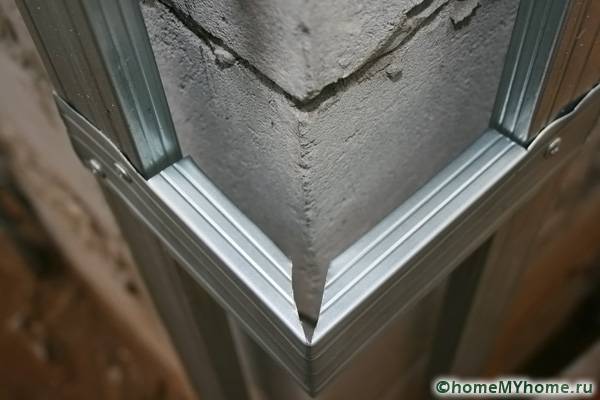
Docking metal battens at the corner of the building
Wooden crate installed
If it is required to install a hydro and thermal insulation layer, then this should be done on top of the installed crate. In this case, the waterproofing is laid over the walls and crate, then insulation mats are tightly inserted into the gap between the guides and, if necessary, closed with a second layer of waterproofing.If expanded polystyrene or polystyrene is used as insulation, then you can save on waterproofing, but pay special attention to the joints and abutments so that the gaps are completely absent. Instructions for dummies for installing siding with their own hands must take into account hydro-vapor barrier device before installing the facade material.

Installation of heat and vapor insulation under the crate
Related article:
Installing profiles
On top of the lathing we install J-profiles on which the facing panels will be attached. Since all structural elements were strictly aligned along a stretched horizontal rope, there will be no problems with the installation of the profiles.
We start the installation from the bottom of the structure. We take the starting profile and fix it at a height of the crate of 5 cm, having previously screwed two self-tapping screws at this height on both sides of the wall as a guide. At the same time, we provide enough space for the installation of corner profiles. You can cut off the excess part immediately after fixing or before installation. Self-tapping screws or nails should be placed approximately in the middle of the special hole for securing the profile.
Setting up a start profile
After fixing the starting profiles, we proceed to installing the external corner profiles. First, we mark the soffits to determine the edges of the elements, and then install the corner profile with a gap of 3 mm to the soffit or roof. We fasten it in the same way as for the starting bar. Be sure to center the profile before tightening. Internal corner profiles are mounted in the same way as external ones.
Corner profile installation
In some cases, when the height of buildings is from one floor along the length, the corners can be more than 3 m and it becomes necessary to perform a profile extension. In such situations, it is necessary to trim each subsequent profile so that it can be inserted into the previous one. To do this, use metal scissors to cut off the side parts for attaching the siding, leaving only the front corner part. The cutting length must be at least 25 mm. Additionally, you will need to leave a gap between the two elements of about 9 mm.
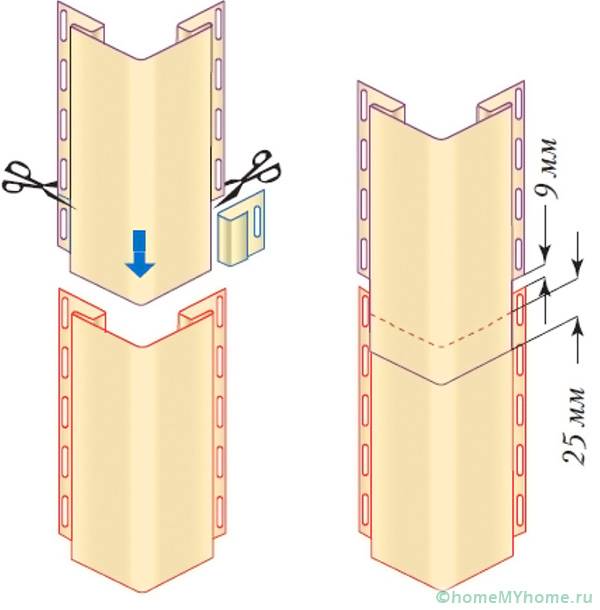
Profile extension method
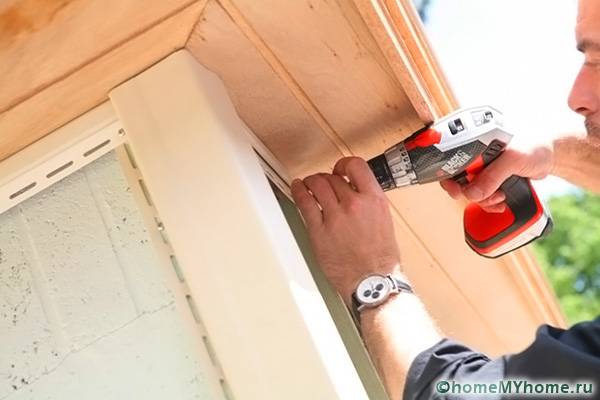
Installation of additional elements for window openings
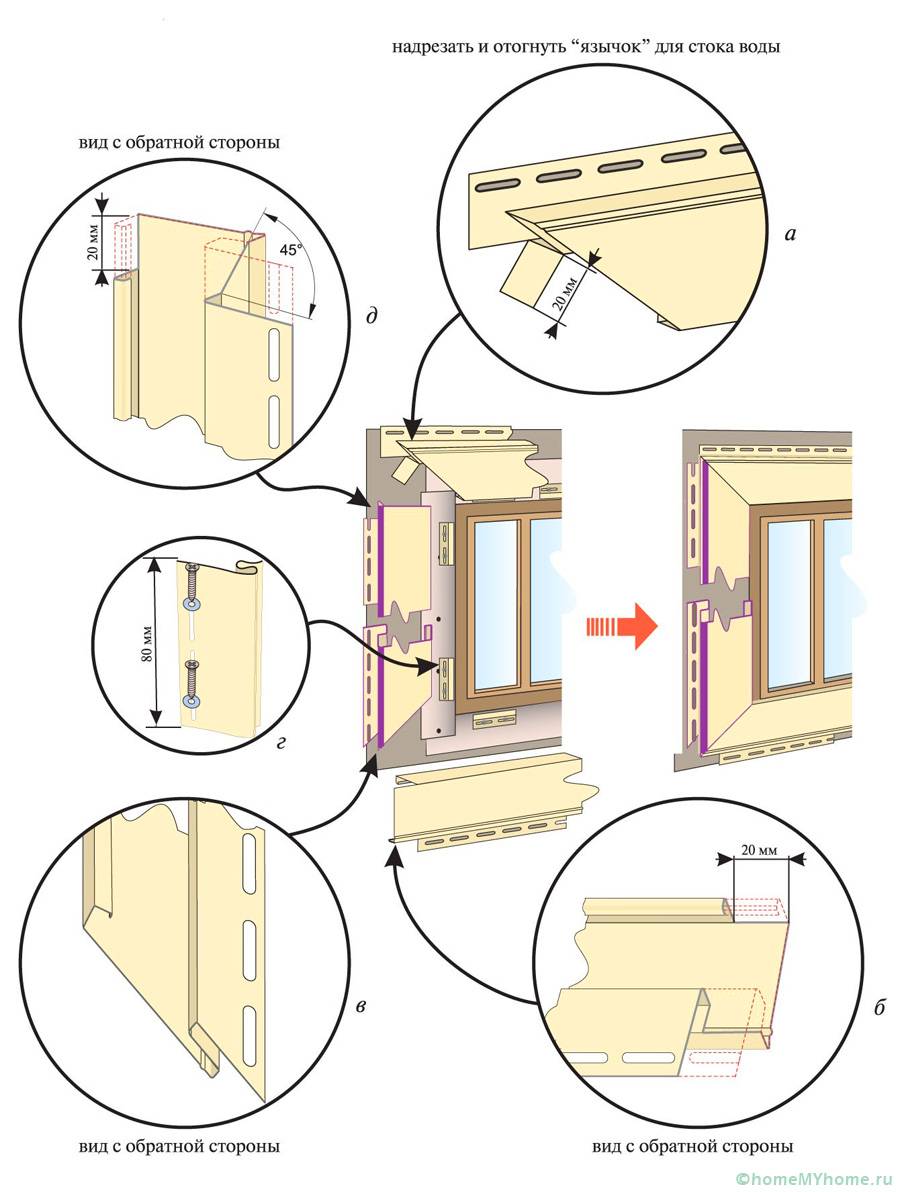
Windows in various types of buildings can be installed in various types of openings, which determine the method of installation and the use of additional elements. Therefore, the installation of near-window siding strips has the following features:
Installation of profiles in case of slopes

Installation of profiles in the absence of slopes
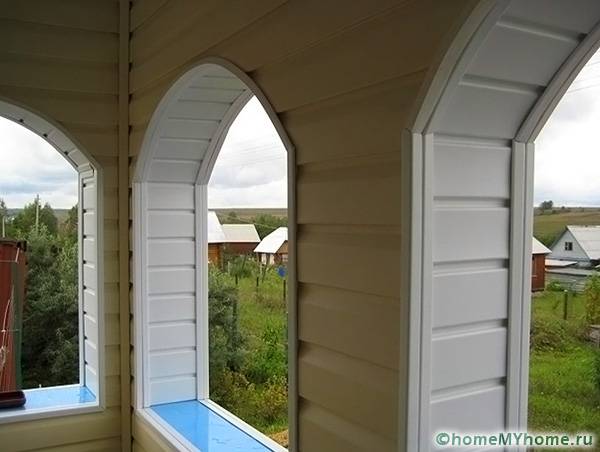
An example of cladding an arched opening
Siding
The first plank is usually installed on the side of the building that is least visible from the street and courtyard. This is necessary for beginners to get a little knack for correctly attaching the slats. Installation is carried out in the starting plate in a special clamp with fixation on self-tapping screws at the points of contact with the battens guides.
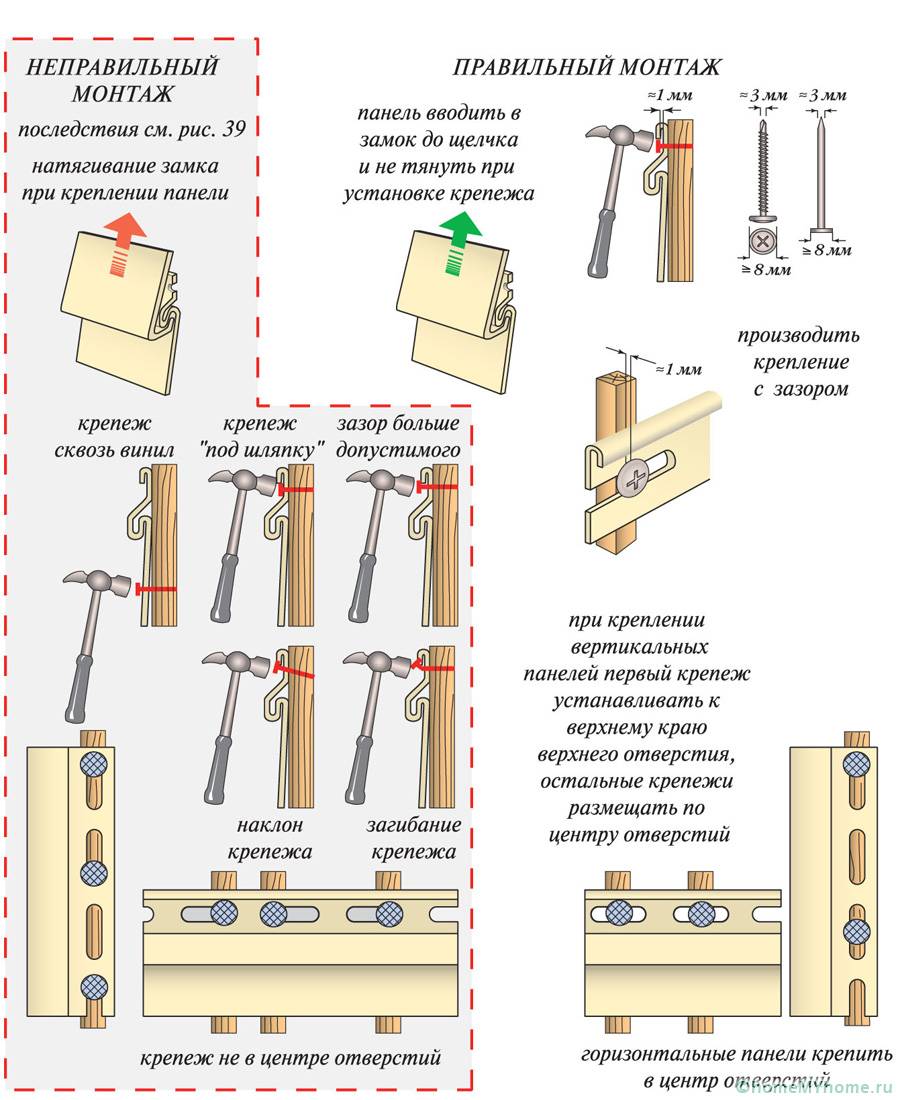
Correct engagement is important to avoid distortion and loss of structural strength. It is imperative to observe the technological indents of 6-9 mm. When tightening self-tapping screws, it is strictly forbidden to deform the panels, as they will then become unusable.
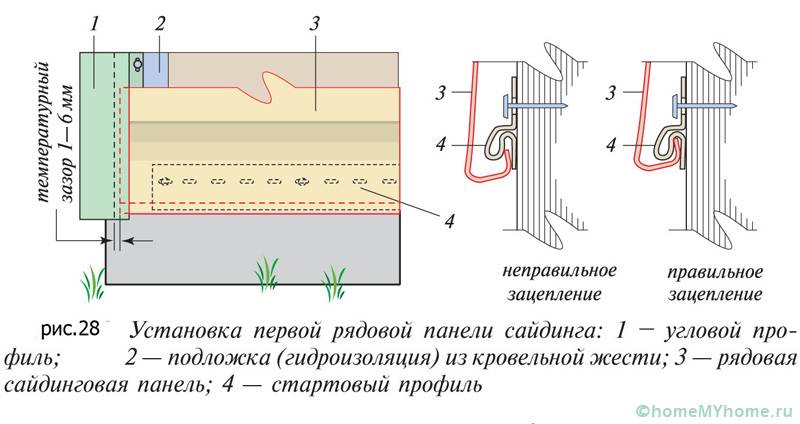
Installing the first panel
We build up the subsequent planks with an overlap with engagement to the bottom row with special locks. The locks and fastening frames must be shortened beforehand. Every third row must be checked for distortions. When approaching the opening, cut off the excess part of the plank.
Vinyl panel fixing rules
Windows are sheathed with siding only after the installation of the low tide. For this, the opening is measured and the elements are cut to size with a bend at the point of attachment at a right angle and from the side of the drain. After that, the ebb is attached to the frame using an adhesive or liquid nails in order to achieve high tightness and contact density.
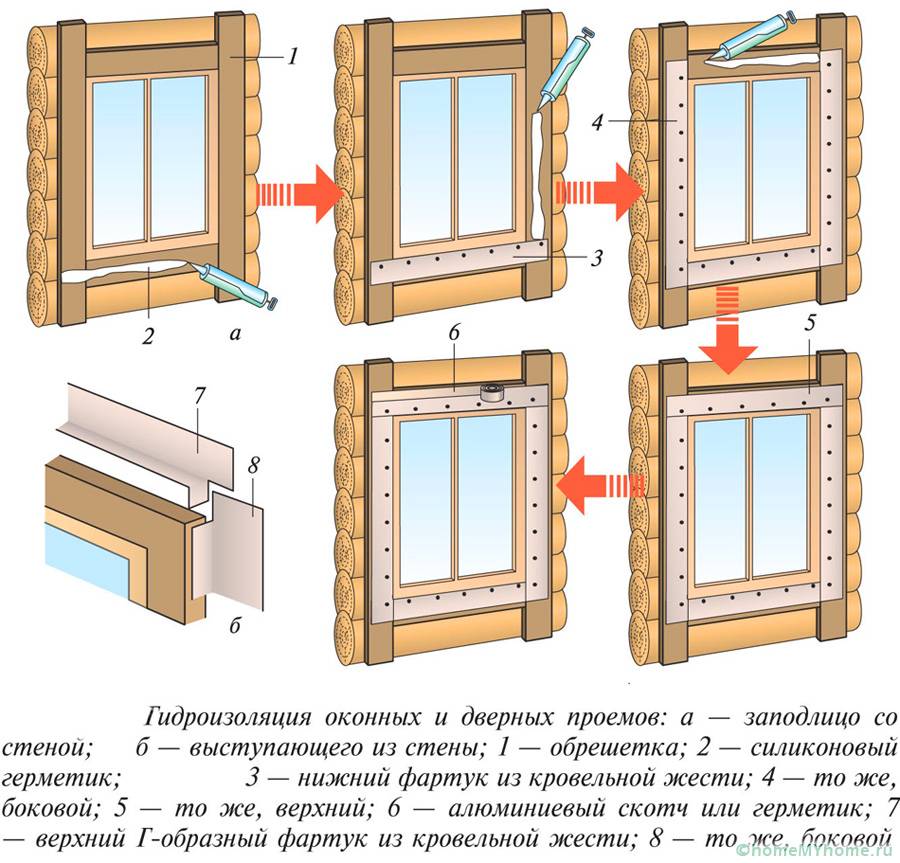
Waterproofing window openings
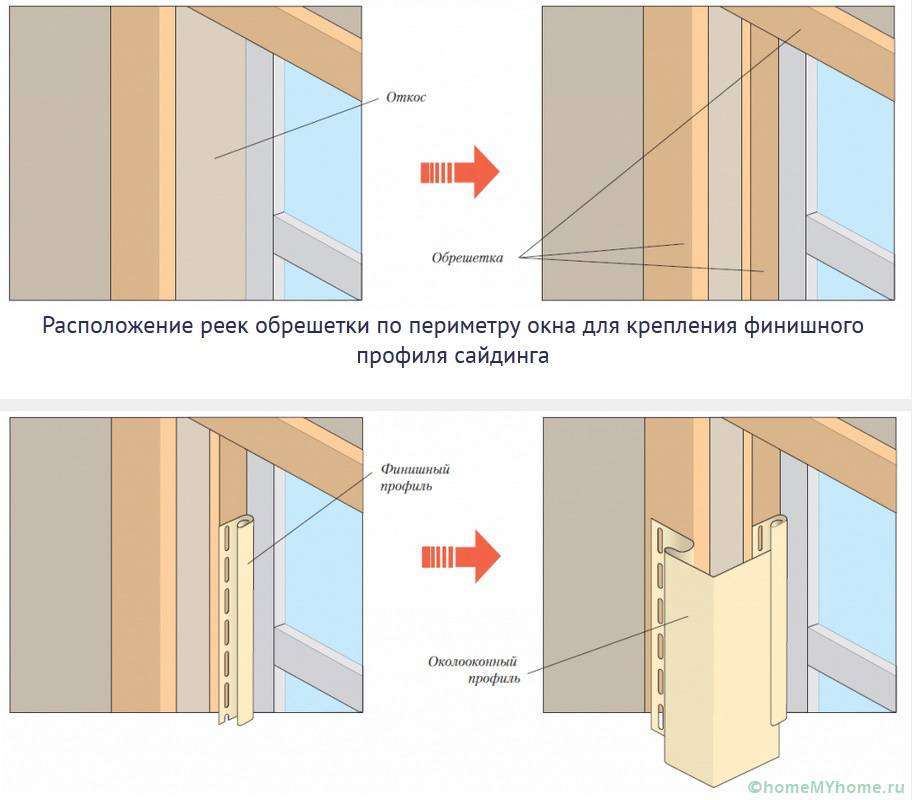
A J-profile is installed on the sides of the window opening. Measure the height of the window frame, and then cut the profile to size. The lower parts are slightly folded back for a tight fit with the ebb. A finishing bar is attached to the bottom of the profile along the width of the opening, and to the top - the starting bar.
Framing window openings

For cladding doorways, proceed in the same way as in the case of a window - install J-profiles and corner additional elements, if there are slopes. More precisely, the installation of siding with your own hands is described by the instruction in video format.
When approaching the junction of the roof at a distance of one or two planks, it is necessary to stop the sheathing and think over the competent implementation of the docking. To do this, you need to measure the distance from the lock of the penultimate row to the finish bar. From the obtained value, it is necessary to subtract 10-20 mm by the indent. Then the whole panel should be marked out and the upper lock connection should be cut off from it. In the upper part, we make hooks (incisions with bending towards the front) with a step of 200 mm. We insert the finished strip into the penultimate panel with snapping into the lock.
Installing the finish bar
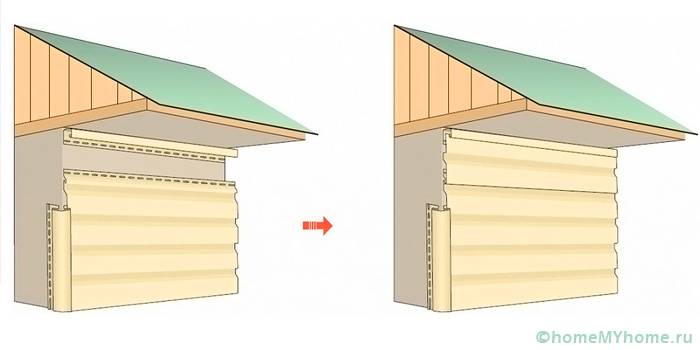
To cover the gable, we install an internal corner element at the junction with the wall and an external one at the end of the roof or a J-profile. The cladding is done in the same way as for the walls.
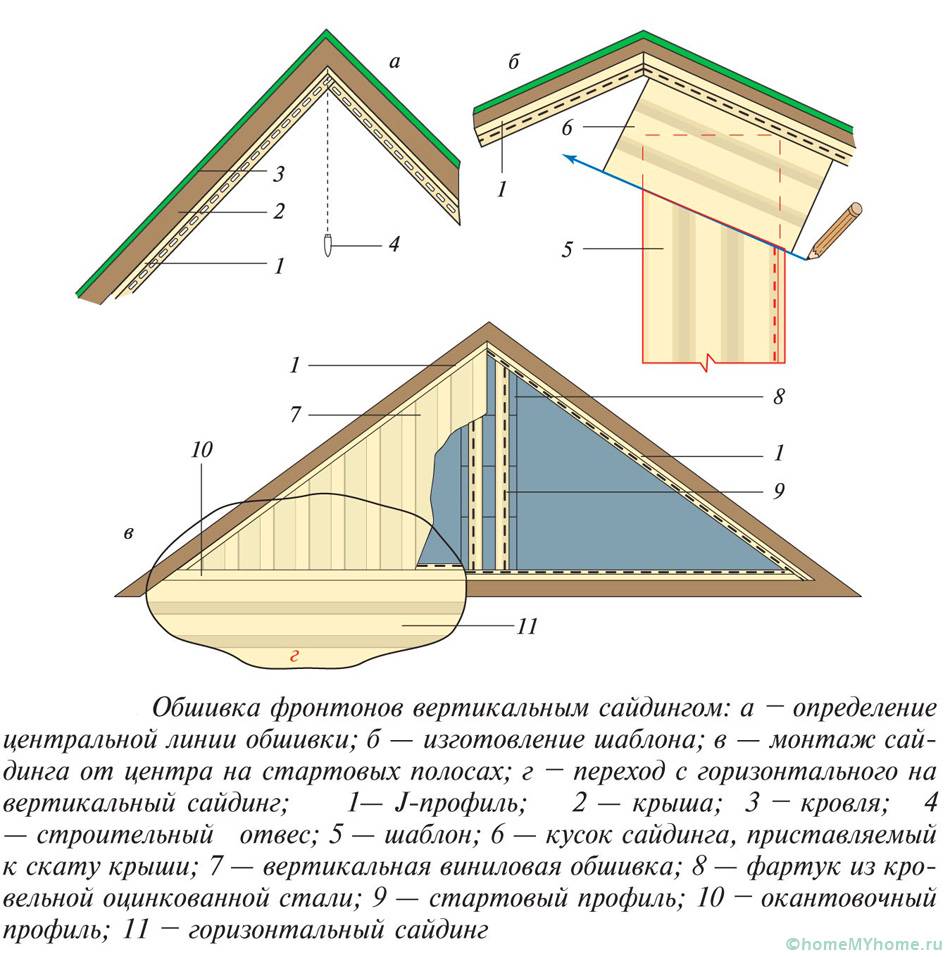
Sheathing gables with vertical slats

Recommendations and tips for installing panels
Do-it-yourself siding installation, according to the instructions for dummies, requires compliance with the following rules and recommendations:
Conclusion
Do-it-yourself siding installation is described in detail - instructions for dummies with tips and tricks. It tells how to properly carry out the preparatory work and avoid many problems during installation. Particular attention was paid to the sheathing of the openings and the implementation of the abutment to the roof. Good luck with the repair!
Video: siding installation technology


See also:
 How to make a facade insulation with mineral wool with your own hands?
  Finishing putty for painting with your own hands
 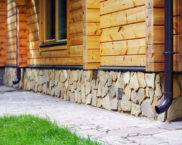 Finishing the basement of a private house: aesthetic and practical options
  How to calculate the area of a room: professional advice and basic rules
  We calculate stairs online: theory and calculators
  Siding "under brick" and "stone" - varieties, characteristics, installation features


