
From wall preparation to grouting: exploring the nuances of proper bathroom tiling
The main feature of bathroom interior design is its practicality. This is a room with a specific operating mode: it is always humid here, steam settles on the walls, and there are large temperature differences. Of all the decorative coatings, tiles are the best choice for this room. Today the editors of homemaster.techinfus.com/en/ magazine offer you all the most useful information on how to install tiles in a bathroom. We will tell you how to prepare the base, tell you how to properly dismantle old ceramics, decide on the choice of solution, and tell you step by step about the stages of tile laying.

Tiled cladding - a practical and durable option for the bathroom
The content of the article [Hide]
- 1 Popular options for laying tiles in the bathroom with photo examples
- 2 Preparing the room for laying tiles in the bathroom with your own hands
- 3 How to properly lay tiles in the bathroom: a step-by-step master class
- 4 How to put tiles on tiles in the bathroom and is it worth doing
- 5 How to do it right: installing the bath before or after laying the tiles
- 6 Price issue: how much does it cost to install tiles in the bathroom per m²
Popular options for laying tiles in the bathroom with photo examples
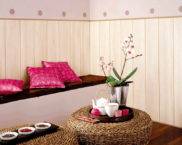
Bathroom all family members visit every day and not once. It is important that this room looks decent and meets strict hygiene and comfort requirements. Modern design art has not spared this issue. The trend is bright and rich colors, original textures and colors. What is the most popular now? Stone and wood are favorite textures for those who prefer eco-design.

Warm shades, embossed surfaces will help make the bathroom cozy and inviting

A novelty in the decoration - imitation of genuine leather. This is an unusual technique that allows you to achieve an amazing look
Among the models that are especially popular, it is worth noting tiles with a complex ornament or pattern. In such a masonry, several elements are collected into one big picture.

Manufacturers offer a wide range of collections, which include tiles for the main surfaces, ornament for decoration and an image to match the rest of the decoration
Before making a choice in favor of one of the popular tile options, carefully examine the room for illumination and overall dimensions. With the right styling, you can visually correct the room.
To make a narrow room wider, you need to put light tiles in a horizontal or diagonal direction, higher - in a vertical one. The effect should be complemented with directional ornament or friezes. The correct combination of colors and shades is also an important point. Use a designer color wheel to find the right combinations.

The contrasting play of black and red, green and white, orange, gray and white is in fashion now
A few tips for laying tiles in the bathroom with your own hands:
- Do not use ornamental tiles in small bathrooms where you have to hide the decoration behind the plumbing fixtures. Because of this, the geometry of the room will be visually disturbed.
- If the tile is going to be a common pattern, place it in the center of the wall or floor, and around the edges - edging and background material.
- If your choice is made in favor of the patchwork technique, use such a clack only on one of the walls or the floor, and decorate the rest of the surfaces with plain tiles of one of the colors prevailing in the patchwork. If this is not done, the interior will be too motley and clumsy.
- Recently popular hexagonal tiles look great with a contrasting grout color. When working with such material, it is not at all necessary to lay out the walls or the floor from corner to corner, you can step back a little from the corner, so the masonry will look very interesting.

Wood-imitating tiles are laid like parquet - herringbone or wicker. This design goes well with white tiles. Imitation stone and natural wood furniture
Preparing the room for laying tiles in the bathroom with your own hands
When choosing a cladding, you need to start not from an attractive pattern or relief, but from the real dimensions of the room. So start repairs from the fact that draw a sketch of the room. Carefully measure all its dimensions, study and transfer to paper door and window openings, the location of the plumbing and furniture, sockets.

After drawing up such a sketch, you will be able to visually imagine where you will have problems with styling, possible places for cutting and placing the main drawing
Freeing the bathroom from furnishings
The second stage of preparation for renovation is the release of the premises from plumbing and furniture. Don't expect to be able to lay the tiles without touching the toilet, bath, and sink. This will not only be inconvenient, you will have to make extra pruning, which is unlikely to decorate the masonry.

When removing plumbing, do not forget to turn off the water. Otherwise, the neighbors will ask you to make repairs and they too
To prevent odors from the sewer pipes from interfering with your work, close them with plugs.
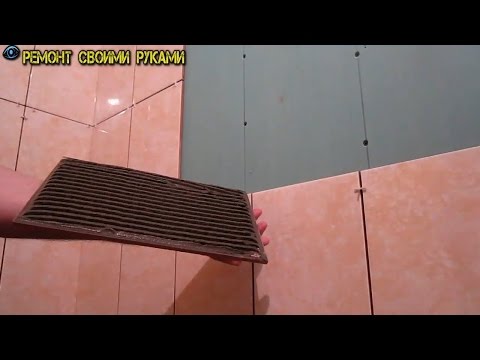
Dismantling the old cladding
The immediate preparation of walls and floors for the cladding process begins with the removal of the old coating. If the walls were previously decorated with ceramic material, you need to remove it along with the glue. Removing old tiles begins with cleaning the joints. It is necessary to remove the grout as much as possible and moisten the walls. After a while, start removing the tiles, starting from the outermost elements.If you can't do this with a chisel and a hammer, use a drill with attachments.

The glue irregularities remaining after removing the tile are removed with a grinder
If the walls were previously simply painted, the paint is removed with a grinder.

The embossed plaster also has to be completely removed, for this it is easier to use a drill. Wallpaper or oilcloth can be removed, the surface after them can be simply sanded with emery.
Tiling in the bathroom: leveling the walls
Even in new buildings, the walls cannot be called ideal, and what can we say about surfaces that have been repeatedly repaired. Therefore, after removing the old cladding, evaluate the scale of the disaster: how serious irregularities were exposed after work. If the height differences are within the range of 3-6 centimeters, plastering work can be dispensed with. If more, you will have to sheathe the walls with plasterboard or OSB plates.
For leveling with plaster mixture, treat the walls with a quality primer and install beacons that will show landmarks to create a level surface. To make the plaster mix firmly attached to the wall, use notches.

After drying, the plaster is sanded with emery, all cracks are rubbed
Aligning the walls with moisture-resistant slabs "steals" 5 centimeters along each wall, consider this nuance. The slabs are attached to the lathing, all the seams between them are hidden by the putty mixture.
How to properly lay tiles in the bathroom: a step-by-step master class
There are two options for solving the question of how to lay tiles in the bathroom: do it yourself or set a task for specially trained people. In fact, you don't need to have a special education or any supernatural skills to lay tiles. It's pretty simple. So, let's consider how to lay tiles in the bathroom with our own hands without any problems.
Tool revision
There are some specific tools that you will definitely need to install bathroom tiles on the floor or walls. You will probably find a drill and tape measure in your home. Those who have already been involved in repairs at least once have probably acquired a building level, it is needed in almost any work. But from the "special" tools you will need:

For the final finishing step, you will need a sponge to remove excess glue
Among other things, prepare two containers: for mixing the glue and for soaking the tiles. The glue mixture can be made using a construction mixer, but if it is not there, it does not matter. The bathroom is usually a small room, and not much glue is required; you can work with your hands or with a drill attachment.
What solution to choose for laying tiles in the bathroom
And here you have two options: make the tile adhesive yourself or buy a ready-made mixture. All components of the solution are on sale separately: sand, cement, water and PVA glue. All together will cost you less than a ready-made mixture. Such an adhesive solution can not be saved and at the same time, when laying it, align the walls with it. The main thing is to choose the right proportions.

Please note: for tiling, you need to use only fresh high-quality cement of a brand not lower than 300
It is better to take fine sand for tile mortar and additionally sift it, removing all pebbles and shells. 4 parts of sand are added to grade 300 cement, 400 - 5, 500 - 6.
For plasticity, PVA glue is added to the cement slurry - about 200 gna 10 kg. If no PVA is available, you can use dishwashing liquid. Slaked lime will make your homemade tile glue moisture resistant.

Before laying on a cement mortar, the tile must be moistened - lower the tile for a few minutes in a container with water
Ready mixes for laying tiles on the wall in the bathroom are of three types:

Instructions for preparing glue from a dry mixture are placed on the packaging by the manufacturer

The mastic is sold in sealed buckets
Master class: how to lay bathroom tiles on the wall
We offer you a master class on how to properly lay tiles in the bathroom. The technology is quite simple, so even a beginner should have no difficulty.
| Illustration | Action Description |
|---|---|
 | Tiling begins with leveling the walls and priming the surface. Use a deep penetration primer. |
 | All pipe exit points must be treated with moisture-proof mastic. If possible, cover all walls with such mastic to a height of 0.5-1 m. |
 | Use a special waterproof tape at the junction of walls and floors. It is also covered with mastic. So, even in the event of an emergency leak, you will not flood your neighbors. |
 | The tile adhesive is applied directly to the wall. Use a notched trowel for this. |
 | The first row of tiles is placed at a distance from the floor. How to determine this distance: measure from the ceiling how many whole tiles you plan to lay. The trimmed tiles will be fastened from below, leave this row, you will fasten it last. |
 | In places where the tile lies on the outlets of communications, you need to make holes. Use a drill for this. You have to work very carefully, ceramics is a fragile material. |
 | During the masonry process, check the location of the elements with a building level. |
 | If you are laying ceramic mosaics, use clear or white tile adhesive. |
 | The bottom row of the trimmed tiles is placed after the floor has been finished. This is the only way to determine the exact dimensions for cutting. |
 | Perform grouting. It will protect the seams from moisture and additionally secure the masonry. Moisten the joints with a spray bottle before starting grouting. The trowel is applied with a rubber spatula. For colored tiles, the grout can be tinted to match. |
 | In the corners and at the joints of walls and floors, the joints are filled with sealant. |
 | If the seams are deep, they are filled with a special cord and then treated with a sealant and grout. |
 | The grout remaining on the surface is erased with a damp sponge. If after that there are stains, they are wiped off with felt. |
A small video course on laying tiles in the bathroom on drywall.
How to properly lay tiles in the bathroom on the floor: video instructions
We took a closer look at how to lay bathroom tiles on the walls. Traditionally, the floors in this room are covered with ceramics. How to do it correctly - in this video.

Related article:
How to put tiles on tiles in the bathroom and is it worth doing
Laying tiles on old flooring is not a good idea, and there must be good reasons for this:

If this is your decision, conduct a thorough revision of the existing cladding. All cracked and loose parts must be removed. If more than 15% of the cladding had to be removed, remove all
If the old tile is covered with glaze, you need to remove it with a grinder. This is the only way to achieve high-quality gluing of the new cladding. After grinding, the surface is treated with a primer and then the masonry is carried out as described above.
How to do it right: installing the bath before or after laying the tiles
The question is not fundamental. If you are worried that you will not be able to install the plumbing correctly the first time, put a bathtub and then make repairs.

In this case, the tiles are laid from the edges of the bath, stepping back a few millimeters. After this gap is filled with sealant
If you decide to install plumbing after repair, then the side of the bathtub, which is in contact with the masonry, is also sealed with silicone so that water splashes do not fall behind the font.
Related article:

Price issue: how much does it cost to install tiles in the bathroom per m²
Self-facing with ceramics is troublesome and takes a lot of time, especially if you have little experience. For busy people, the easiest way is to turn to professionals.

Do not choose a master at random: ask your friends and neighbors who laid the tiles in their apartment, rate the finished work
At June 2018 prices, on average, an order from a finishing company will cost you 600-800 rubles per square meter. This is without taking into account the possible work to level the walls. The cost of laying tiles in the bathroom from a private master is 450-500 rubles.

Putting the tiles in the bathroom with your own hands is a feasible task. You just need to follow a simple algorithm and do everything carefully.
If you have a similar experience and advice for our readers, share them in the comments!

See also:
 How to fix PVC panels to the wall and ceiling: installation features
  How to calculate the area of a room: professional advice and basic rules
 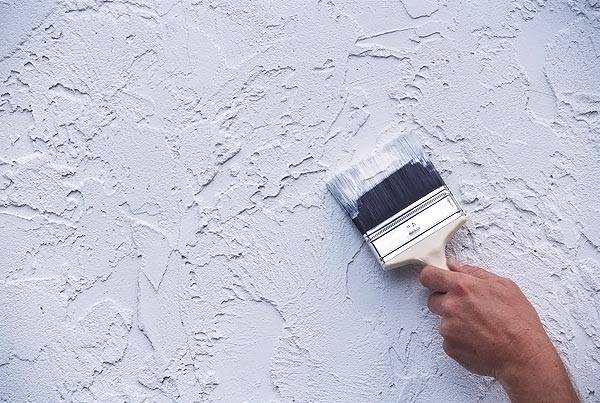 DIY textured plaster from ordinary putty
 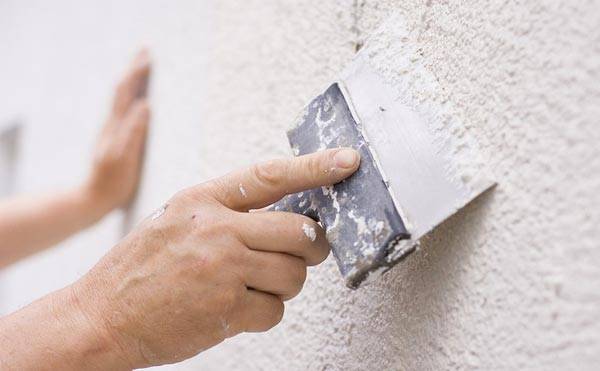 Finishing putty for painting with your own hands
  A practical choice for renovation - painting the walls in the apartment: design, photo examples and types of paint
 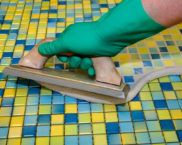 Epoxy grout for tiles: pros and cons of use, instructions for use


